 how-to
Preventing Mechanical Breakdown on Side by Sides
Table of Contents
- Side-by-Side Pre-Ride Inspection: 10-Minute Safety Check
- Routine Preventative Maintenance Schedule by Model
- How to Find Your Model's Real Intervals
- Typical Interval Ranges (Always Confirm Against Your Manual)
- Operating Conditions That Shorten Your Intervals
- Engine System Checks and Spark Plugs
- Cooling System and Radiator Checks
- Drivetrain, Brakes, and Fluids Beyond the Engine
- Troubleshooting Warning Signs Between Services
- CVT Belt Wear Diagnosis and Replacement
- UTV Air Filter Maintenance for Dusty and Muddy Rides
- Side-by-Side Oil Change Schedule and Fluid Checks
- Side-by-Side Maintenance Checklist for Every Ride
- Post-Ride Cleaning, Storage, and Warning Signs
- Frequently Asked Questions
Last Updated: October 13, 2026
Side-by-Side Pre-Ride Inspection: 10-Minute Safety Check
Preventing mechanical breakdown on side by sides starts with a 10-minute walk-around before every ride. It catches small problems before they strand you miles from the trailer.
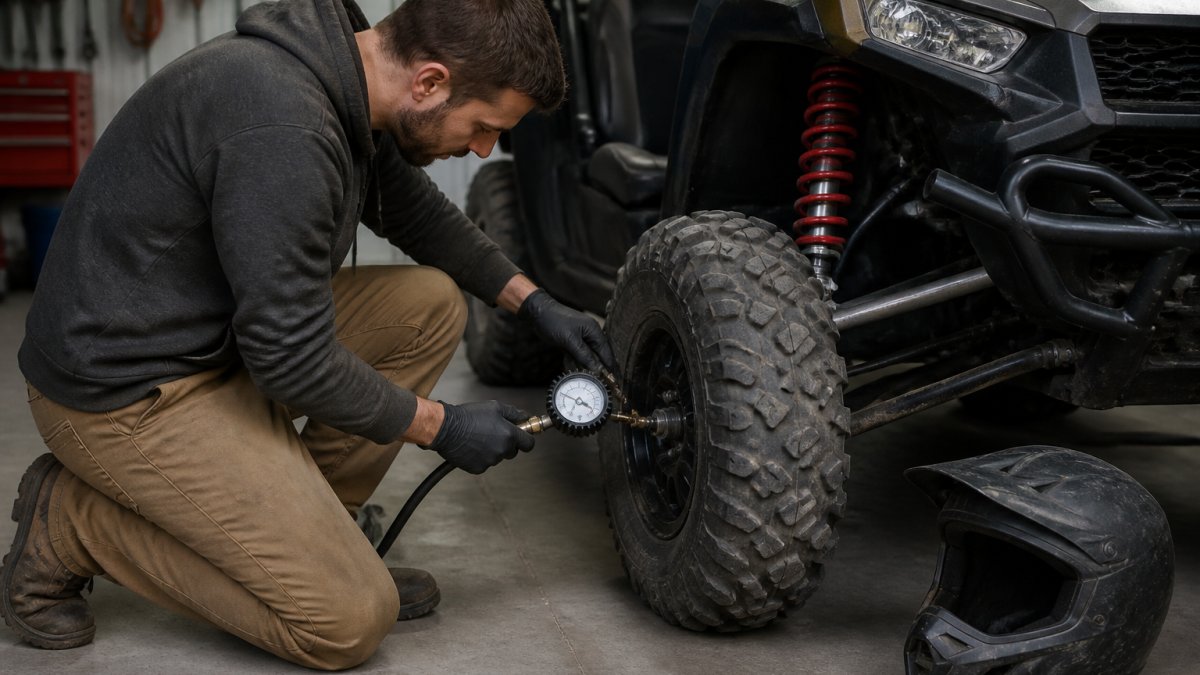
A pre-ride inspection is a short, systematic check of tires, brakes, steering, fluids, belts, and battery before you start the engine.
Do it in the same order every time, comparing against a known-good baseline to tell routine wear from a stop-riding problem.
Tires, Brakes, and Steering
Start with the tires. Check pressure with a gauge, not a kick, most side-by-side tires run low teens to mid-20s PSI depending on tire and load, so check the placard or manual.
Then test the brakes. Press the pedal and lever, they should feel firm, not spongy. A sinking pedal usually means air in the line or a fluid leak.
Check steering play by rocking the wheels side to side.
- Tire pressure: check cold, all four, against the placard
- Tires: no cuts, sidewall bulges, or embedded debris
- Brakes: firm pedal and lever, fluid at the mark, no wet spots
Fluids, Belts, and Battery
Pop the hood and check oil, coolant, and brake fluid against the marks.
Inspect the drive belt for cracks and glazing. A shiny surface means slipping and heat; cracks or missing cogs mean near failure.
Check battery connections for corrosion and tightness, loose or corroded terminals cause starting failure, a common trailside breakdown. A white or green crust means corrosion; clean and retighten.
Reading the Warning Signs Before You Ride
A pre-ride inspection also catches early symptoms that predict a breakdown. Watch for these:
- New puddle or drip under the machine, coolant, oil, or gear oil. Identify the color and smell before you assume it's nothing.
- Unusual noise at idle, a rattle, tick, or whine that wasn't there last ride. Note where it's coming from.
- Vibration through the floor or steering, often a worn belt, bad bearing, or loose mount.
Riders often dismiss a small new noise as "normal for this machine" and lose a day on the trail. If something changed since the last ride, treat it as a signal.
Stop-Riding Issues vs. Routine Checks
Not every finding means cancel the ride:
- Stop and fix before riding: spongy or failing brakes, coolant leak, fuel smell, cracked or glazed belt, wobbling wheel, exposed cord on a tire, loose lug nuts.
- Note and monitor: minor tire wear, slightly low fluid that you top off, a faint new noise you can locate and it isn't getting worse.
- Routine: tire pressure adjustment for load, cleaning dust off the air filter, tightening a mirror or accessory mount.
When in doubt, fix it in the garage, a ten-minute repair beats a multi-hour trail recovery.
Routine Preventative Maintenance Schedule by Model
Preventative maintenance is work done on a schedule, not when something breaks. Intervals vary by make, model, engine size, and riding style, a 1000cc machine towing in the desert has a very different service rhythm than a 500cc trail machine on packed dirt.
How to Find Your Model's Real Intervals
Your owner's manual is the authority and usually lists two schedules: "normal" and "severe duty." Most recreational riders fall into the severe category more often than they realize.
Here's how to pull the right numbers:
- Find the maintenance table in your owner's manual (usually in the back).
- Identify the severe-duty column, it's the one that applies to dust, mud, towing, idling, and temperature extremes.
- Note whether intervals are listed in engine hours, miles, or months, side-by-sides often use hours, which is why an hour meter matters.
- Write the next three services on a card and tape it in the garage.
Without a manual, most manufacturers publish free PDFs on their brand websites, and dealers can print the maintenance table for your model year.
Typical Interval Ranges (Always Confirm Against Your Manual)
These ranges reflect what most manufacturers publish, but they are starting points, not a substitute for your manual.
| Service Item | Typical Interval | Check Every Ride? |
|---|---|---|
| Engine oil and filter | Per manual, often 50-100 hours | No |
| Air filter cleaning | Every ride in dust or mud | Yes |
| CVT belt inspection | Per manual, often 100-200 hours | No |
| Coolant level | Weekly | Yes |
| Battery connections | Monthly | Yes |
| Tire pressure | Before every ride | Yes |
| Brake fluid | Per manual, often annually | No |
| Differential / gear oil | Per manual, often 100-200 hours | No |
| Spark plugs | Per manual, often 100-200 hours | No |
| Valve clearance | Per manual, often 200+ hours | No |
Operating Conditions That Shorten Your Intervals
The same machine needs different service depending on use, and riders who follow the normal schedule in severe conditions wonder why parts fail early.
- Heavy dust: air filter and engine oil intervals shrink dramatically. Dust that gets past the filter ends up in the oil.
- Deep mud and water crossings: check differential and gear oil for water contamination after every wet ride. Milky oil means water got in.
- Extreme heat: coolant, oil, and belt all work harder. Inspect the cooling system more often.
If you ride in two or more of these conditions regularly, default to the severe-duty schedule.
Engine System Checks and Spark Plugs
The engine system covers air, fuel, spark, and oil. A dirty air filter or fouled plug causes rough running and power loss long before a full breakdown.
Pull the spark plug and check its color. A light tan tip means the engine runs well (How do I "read" a spark plug?). Black soot points to a rich mix or a clogged filter.
Cooling System and Radiator Checks
Overheating is a leading cause of side-by-side breakdowns. Check coolant when the engine is cold, never hot, opening a hot system can scald you and skews the reading.
Check the radiator for bent fins, mud, and debris, and clean it with low-pressure water, high pressure bends fins and blocks airflow.
Watch the temperature gauge. A slow climb toward the red zone on a ride that used to run cool often means a clogged radiator, failing fan, or low coolant.
Drivetrain, Brakes, and Fluids Beyond the Engine
Engine checks get the attention, but drivetrain and brake neglect cause just as many trailside failures.
- Brake pads: check thickness at every oil change. Worn pads score rotors and reduce stopping power.
- Brake fluid: absorbs moisture over time. Flush per the manual, usually annually, and use the type specified.
- Shaft drive oil: on shaft-drive models, use the correct hypoid gear oil and change it on schedule.
For shaft-drive machines, use the right gear oil. Our PRO HONDA 8oz SHAFT DRIVE OIL is a single-application hypoid gear oil approved for shaft-drive motorcycles and ATVs, with additives that protect against wear and corrosion.

Troubleshooting Warning Signs Between Services
You don't need to wait for the next scheduled service. These signs mean something is changing:
- Overheating on a normal ride, coolant level, radiator airflow, fan operation, or a failing thermostat.
- Fluid leaks, identify color and location. Coolant is usually green, orange, or pink; engine oil is amber to black; gear oil is darker and smells distinct.
- Unusual vibration, worn belt, bad bearing, loose mount, or a bent component.
The first symptom is often subtle. Treat any change from normal behavior as a data point and check it against the schedule before the next ride.
CVT Belt Wear Diagnosis and Replacement
CVT belt wear is the breakdown most riders miss until it fails, the belt wears faster than almost any other part and leaves you stuck with no drive.
Diagnose belt wear by checking width, glazing, and cracks. A shiny surface means slipping; cracks or missing cogs mean near failure. Measure width against your manual's spec.
Replace the belt at your manual's interval, or sooner if you ride hard in mud and sand. Keep a spare belt and tools on every long ride.
UTV Air Filter Maintenance for Dusty and Muddy Rides
UTV air filter maintenance is the most important service for dusty and muddy riding. A clogged filter starves the engine of air, kills power, and lets grit into the cylinders.
Clean or replace the filter after every ride in heavy dust or mud. Inspect the intake boot for cracks that let dirt bypass the filter. A little grit does serious engine damage over time.
- Clean the filter after dusty or muddy rides
- Check the intake boot for cracks
- Never run without a filter, even briefly
Side-by-Side Oil Change Schedule and Fluid Checks
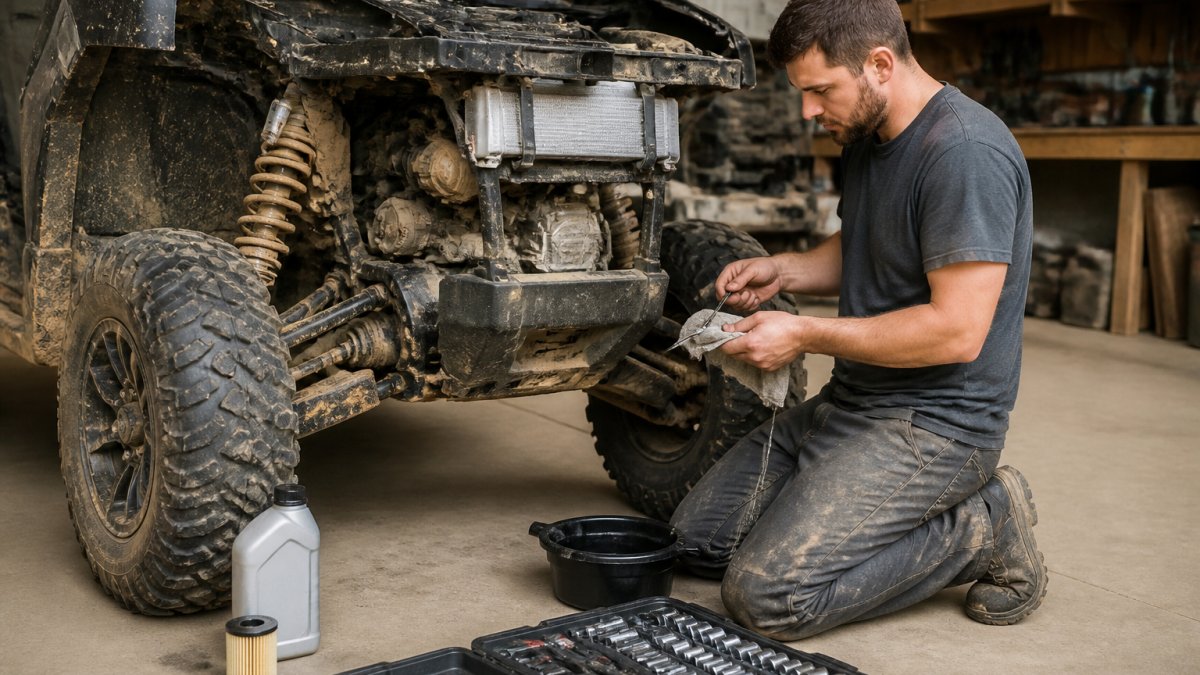
Your side-by-side oil change schedule comes straight from the owner's manual. Most machines need an oil and filter change based on engine hours, not miles. Dusty, muddy, or hard use shortens that interval.
Check these fluids on a regular basis:
- Engine oil and filter
- Coolant
- Brake fluid
For shaft-drive machines, use the right gear oil. Our PRO HONDA 8oz SHAFT DRIVE OIL is a single-application hypoid gear oil approved for shaft-drive motorcycles and ATVs, with additives that protect against wear and corrosion.
Side-by-Side Maintenance Checklist for Every Ride
This side-by-side maintenance checklist keeps your pre-ride and post-ride routine consistent. Print it and run it every time.
- Check tire pressure and condition
- Test brakes for firm feel
- Check steering for play
- Inspect drive belt for wear
Track your hours so you know when the next big service is due. Our GET HOUR METER fits in seconds with double-sided tape, detects engine run time from frame vibrations, and is fully waterproof for the worst conditions.

Post-Ride Cleaning, Storage, and Warning Signs
Post-ride care prevents tomorrow's breakdown. Mud and grit cause corrosion and hide damage, so a quick wash and inspection after every ride pays off.
Clean the machine, then look for warning signs:
- New leaks under the machine
- Unusual noises or vibration
- A spongy brake pedal
- Coolant or oil smell
For storage, protect the engine from the inside out. Our STA-BIL Fogging Oil coats internal components to prevent corrosion, displaces moisture, and lubricates cylinders to prevent start-up damage in all 2-cycle and 4-cycle gasoline engines.

Frequently Asked Questions
What maintenance helps prevent a side-by-side from breaking down?
Following a side-by-side maintenance checklist prevents most breakdowns. Check tire pressure, inspect the CVT belt, test the battery, and verify fluid levels before every ride. Replace the air filter when dirty, change oil per your side-by-side oil change schedule, and inspect the cooling system for leaks. These steps catch small issues before they strand you on the trail.
How often should you service a side-by-side?
Service intervals vary by model and use. Most manufacturers recommend an oil change every 50 to 100 hours or 1,000 miles, whichever comes first. Air filter cleaning should happen every 10 to 20 hours in dusty conditions. CVT belt inspection every 500 miles. Check your owner's manual for exact intervals, and use an hour meter to track engine hours accurately.
What should you check before riding a UTV?
A side-by-side pre-ride inspection covers tires for pressure and damage, brakes for firm feel, steering for play, all fluid levels, battery connections for corrosion, and the CVT belt for wear. Also check for loose chassis parts, inspect the air filter, and confirm lights work. This 10-minute safety check prevents most mechanical breakdowns on side by sides.
How can you prevent a side-by-side from overheating?
Prevent overheating by keeping the radiator clean and free of mud, checking coolant levels before each ride, and inspecting the radiator cap for proper sealing. In dusty conditions, clean the cooling fins after every ride. If the temperature gauge climbs, stop and let the engine cool. Overheating often signals a cooling system issue that needs repair before the next trip.
A breakdown on the trail doesn't have to end your ride. With the right parts and a simple routine, you can catch problems early and keep your machine running season after season. Monarch Sandbox carries the maintenance parts and gear that make it easy, from hour meters to fogging oil and shaft drive oil, all selected for performance and durability. Our team is here to help you find the right fitment for your machine. Shop now at Monarch Sandbox and ride harder with gear you can trust.