 how-to
How to Fit a Motorcycle Helmet Properly: Step-by-Step
Table of Contents
- Start With the Right Measurements
- Match Your Head Shape to the Helmet Shell
- How Tight Should a Motorcycle Helmet Be?
- Putting the Helmet On and Adjusting the Chinstrap
- Run a Motorcycle Helmet Fit Test With Pass/Fail Checks
- The Motorcycle Helmet Break-In Period and Long-Term Fit
- Fit Differences by Helmet Type, Certification, and Accessories
- Frequently Asked Questions
Last Updated: October 20, 2026
Start With the Right Measurements
Getting the right helmet size starts with one number: your head circumference. According to NHTSA's motorcycle helmet guidance, a properly fitted helmet is the single most effective piece of protection a rider can wear, and fit begins with accurate measurement.
Here's how to fit a motorcycle helmet properly, starting at the very beginning:
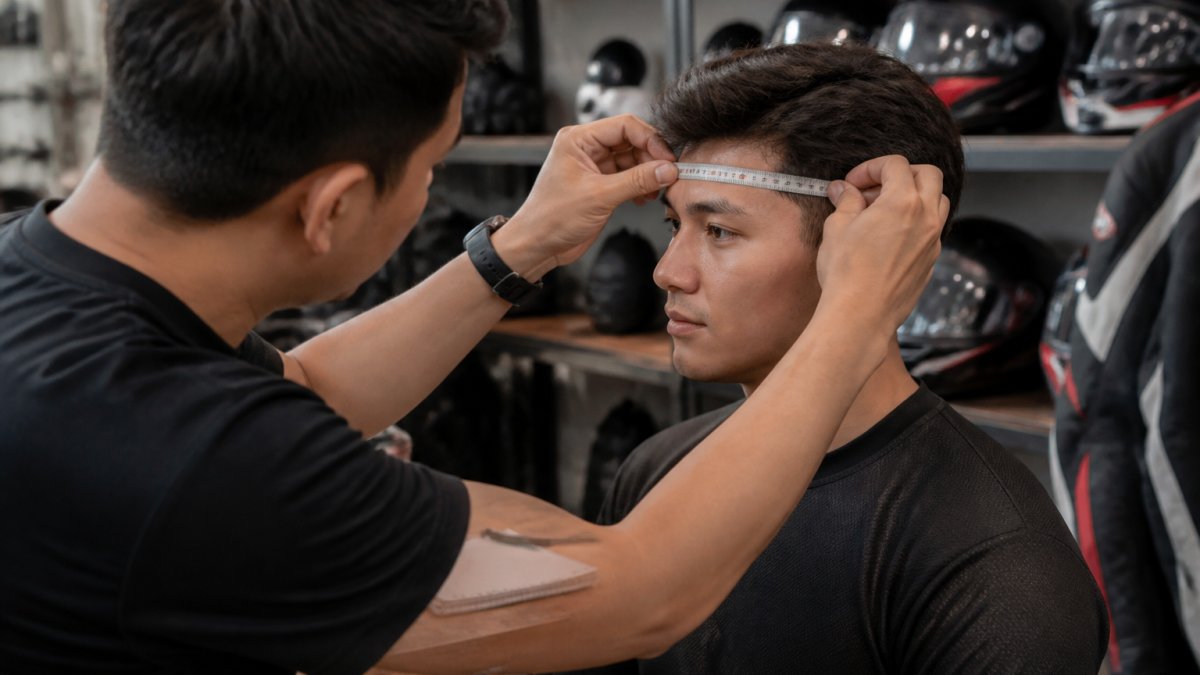
- Wrap a soft measuring tape around your head, about one inch above your eyebrows.
- Keep the tape level all the way around, just above the ears.
- Pull it snug, but not tight enough to dent your skin.
- Write down the number in centimeters.
- Repeat the measurement twice to confirm it.
Take the average of your two readings. If the numbers land on either side of a size break, size up and let the padding do the work.
Match Your Head Shape to the Helmet Shell
Head circumference gets you in the ballpark. Head shape gets you the rest of the way. Most riders fall into one of three groups:
- Intermediate oval: slightly longer front to back than side to side. This is the most common shape.
- Round oval: nearly equal front to back and side to side.
- Long oval: noticeably longer front to back.
A helmet built for the wrong shape will pressure your forehead and temples even at the correct size. The fix isn't a bigger helmet. It's a different shell.
Our Z1R line, including the Z1R Jackal Helmet - Satin, uses an intermediate-oval fit, which suits a large share of riders. If you consistently feel pressure at the front and sides, try a rounder or longer shell before you size up.

How Tight Should a Motorcycle Helmet Be?
A motorcycle helmet should feel snug across the crown and firm against your cheeks, with even pressure and no single hot spot.
The quick rule: if you can slip two fingers under the liner at your forehead, it's too loose. If the pressure gives you a headache within a minute, it's too tight.
Cheek pads should press your cheeks inward slightly. Some riders mistake this for "too small." It usually isn't.
Putting the Helmet On and Adjusting the Chinstrap
How you put the helmet on matters as much as the size you bought. Forcing it straight down stretches the liner, folds the padding, and can mask a shape problem that later shows up as a pressure point.
Putting it on without damaging the fit
- Pull the shell opening apart with both hands, gripping the sides of the opening rather than the chin bar.
- Roll the helmet down over your head from front to back, so the brow line seats first and the rear cradle settles last.
- Once it is seated, press down gently at the crown to confirm the liner is flat against your head.
- Check that your ears sit inside the ear pockets, not folded over or pinched against the liner.
If the helmet will not pass your ears without a fight, it is the wrong size or shape, and no chinstrap adjustment will fix that.
Fastening and adjusting the chinstrap
Once the helmet is seated:
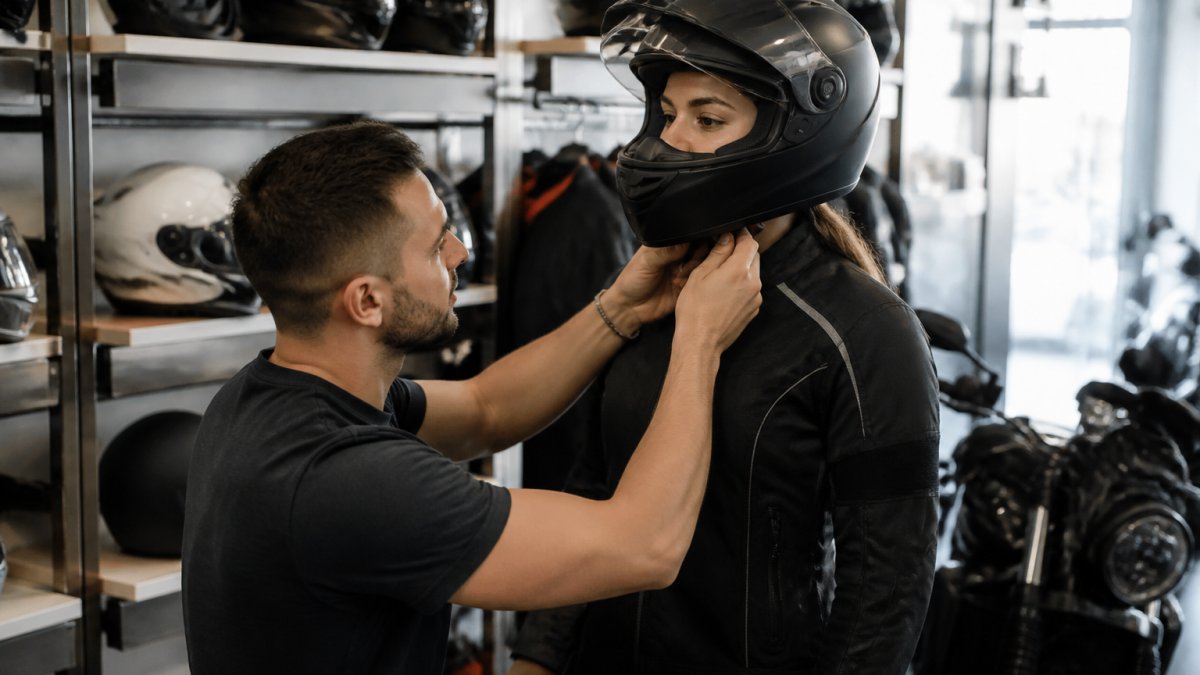
- Fasten the chinstrap and tighten until you can fit one finger under it: snug enough that it cannot slide off your jaw, loose enough that it does not press into your throat.
- Check that the retention system sits flat against your jaw, not your throat. A strap that rides forward under the chin will loosen at speed and can fail the roll-off test.
- Confirm the buckle locks firmly and releases cleanly. Test the release with your gloves on; a buckle you cannot open with gloves is a safety problem.
- Make sure the comfort liner sits flat with no folded edges, especially at the forehead and cheeks.
Know your retention system
Each chinstrap type has its own adjustment quirks:
- Double-D ring. The traditional standard. Thread the strap through both rings, fold it back, and snap the keeper. Tension is set by how far you thread the strap, not by a mechanism that can slip. Check that the strap lies flat through both rings and that the keeper holds the tail.
- Micrometric (ratchet) buckle. A toothed strap feeds into a ratchet housing. It is fast to adjust and easy to release with gloves, but can loosen if the strap is not fully seated. Push the strap in until it clicks through several teeth, then tug it firmly to confirm it is locked. A Z1R Talon Helmet - Solid uses a micrometric chin strap buckle for quick, secure adjustments on and off the bike.
- Seat-belt style buckle. Common on some open-face and half helmets. Confirm the latch engages fully and that the strap tail is captured by the keeper so it cannot flap.
Test the strap under load
A chinstrap that feels snug at a standstill can still fail the roll-off test. With the strap fastened, grip the front of the shell and try to roll it forward off your head. The helmet should hold, and your scalp should move with it. If it peels forward, the strap is too loose, sits too far back on the jaw, or the helmet is the wrong shape.

Run a Motorcycle Helmet Fit Test With Pass/Fail Checks
A motorcycle helmet fit test is a short set of physical checks that tell you, pass or fail, whether the helmet will stay put in a crash. Run it every time you try a new helmet.
| Check | How to Do It | Pass | Fail |
|---|---|---|---|
| Roll-off test | Grip the front of the shell and try to roll it forward off your head | Helmet holds; scalp moves with it | Helmet peels off easily |
| Side-to-side | Hold the shell and shift it left and right | Minimal shifting; skin moves with shell | Shell slides over your skin |
| Front-to-back | Push the shell forward and back | Slight movement only | Helmet rocks freely |
| Chinstrap tension | Open your mouth wide | Chin contacts the liner | No contact at all |
| Pressure scan | Wear it for five minutes | Even pressure, no hot spots | Sharp pain at one point |
If any check fails, change size or shape. Do not "make it work."
The Motorcycle Helmet Break-In Period and Long-Term Fit
Every new helmet has a break-in period, usually a few weeks of regular riding. The liner and cheek pads compress slightly, and the helmet settles into a slightly looser fit. That's normal.
Here's what to watch:
- Slight cheek looseness after a few weeks is expected.
- A crown that suddenly feels loose is not. That means it started too big.
- Persistent pressure points that don't fade are a fit problem, not a break-in issue.
Re-run the roll-off and side-to-side checks after the first month. A Z1R Solaris 2.0 Modular Helmet - Solid with removable cheek pads makes this easier, since you can swap pads without replacing the whole helmet.

Fit Differences by Helmet Type, Certification, and Accessories
A size label is a starting point, not a guarantee. The same nominal size can feel completely different across shell designs, and daily accessories can change whether a helmet fits at all. Work through each variable before you commit.
How helmet type changes the fit
Full-face. The fixed chin bar wraps the jaw and usually produces the firmest feel at the chin and cheeks.
Modular. The flip-up chin bar changes how the shell sits around your jaw.
Open-face (three-quarter). No chin bar means nothing anchors the front of the shell, so open-face helmets depend almost entirely on crown and cheek-pad contact.
Half helmets. These rely on a retention system and a deep nape strap rather than shell coverage.
Verify certification, then verify fit
Certification and fit are separate questions. A helmet can be certified and still be the wrong shape; one can feel perfect and carry no valid label. Check both.
In the U.S., look for the DOT certification label on the back of the shell. It should be a permanent sticker, not a peel-off decal, and reference FMVSS No. 218, the federal motorcycle helmet standard.
Accessories that change the fit
- Glasses and sunglasses. The temples need clearance at the sides of the head. If the arms press into your temples, the shell is too narrow, not too small. Try the helmet on with the frames you actually ride in, and check that the temples do not lift the liner from your forehead.
- Hearing aids and earbuds. These add bulk at the ear pockets and can make an otherwise correct helmet feel tight. Try the helmet on with them in place, and confirm the ear pockets are deep enough that the device is not pressed painfully against the skull.
- Balaclavas, skull caps, and bandanas. A thin layer is fine, but a thick skull cap can add enough circumference to change your size. Measure and fit with the same head covering you will wear when riding.
When to replace or reject a helmet
Fit adjustments cannot restore compromised protective materials. Replace a helmet after any impact, even a drop onto a hard surface, because the energy-absorbing foam can crush invisibly. Replace it every five years regardless of condition, since foam and adhesives degrade with heat, sweat, and sunlight. Reject any helmet with a cracked shell, a frayed chinstrap, a broken buckle, or a liner compressed enough that the helmet shifts freely.
Frequently Asked Questions
What is the 2-2-2 rule when fitting a helmet?
The 2-2-2 rule is a quick fit check: you should be able to fit two fingers between your eyebrows and the helmet's front edge, the chinstrap should allow about two fingers of space under your chin, and the helmet should stay put when you shake your head twice. It catches the most common mistakes, a helmet sitting too high on the forehead or a strap that is too loose to hold the shell in place.
How do I know if a motorcycle helmet fits correctly?
A properly fitted helmet sits level with even pressure across your crown, forehead, and temples. Your cheek pads should press against your cheeks without pain, and the liner should touch your head all the way around with no gaps. Fasten the chinstrap, grab the front of the shell, and try to roll it forward and back. Minimal shifting means a secure fit. If the helmet rotates freely or lifts off your forehead, it is too loose.
How long does a motorcycle helmet break-in period last?
Most helmets need about 10 to 20 hours of riding for the comfort liner and cheek pads to compress and mold to your head. During that motorcycle helmet break-in period, mild tightness across the cheeks and forehead is normal. Sharp pressure points, numbness, or headaches are not. If discomfort persists past the first few rides, the shell shape or size is wrong, not just stiff.
Should I size up or down when buying a motorcycle helmet?
Size to your measured head circumference first, then adjust only for your head shape. Sizing down to force a snug fit usually creates pressure points and headaches. Sizing up to avoid tightness leaves the helmet loose enough to shift in a crash. If you land between two sizes, try both on. The smaller size that passes the roll-off and rotation test is the safer choice, provided it does not cause pain.
Finding a helmet that fits right is not a guessing game, and it should not be a gamble. Monarch Sandbox carries a curated lineup of full-face and modular helmets with intermediate-oval fits, removable liners, and secure retention systems, all selected for real-world safety and comfort. Our team can help you compare shell shapes and sizes before you buy, so you get a helmet that passes every fit check the first time. Shop now and ride with gear you can trust.