 how-to
How to Restore Vintage Powersports Engines: A Step-by-Step Guide
Table of Contents
- Start with a Vintage Engine Inspection Before You Touch a Bolt
- Disassembly and Cleaning for Your Powersports Engine Rebuild
- Vintage Motorcycle Engine Rebuild: Measuring Tolerances and Machining Decisions
- Two-Stroke Engine Rebuild vs. Four-Stroke: Key Differences
- Parts Sourcing and Compatibility for Obsolete Components
- Powersports Engine Rebuild Cost: Budgeting for Your Restoration
- First Start After Engine Rebuild: Setup and Break-In
- Conclusion: Bringing Your Vintage Engine Back to Life
- Frequently Asked Questions
Last Updated: October 7, 2026
Start with a Vintage Engine Inspection Before You Touch a Bolt
Learning how to restore vintage powersports engines starts with one rule: look before you loosen anything. A vintage engine is a time capsule, and every scratch, leak, and wire tells you something before you spend a dollar on parts.
A vintage engine inspection is a full assessment of a machine before disassembly, covering compression, spark, fuel delivery, and external condition. It takes an afternoon and costs nothing.
Start with these checks:
- Compression test on each cylinder, cold and warm
- Spark quality at the plug, plus wiring and ignition condition
- Fuel flow through the carburetor and tank
- Oil color, level, and any metal in it
Document Everything Before Disassembly
Photograph every angle. Label wires with tape. Bag bolts by section.
A common mistake is trusting memory. Three weeks later, you won't remember which spacer went where. A repair guide from the Motorcycle Industry Council stresses that service documentation saves hours on reassembly.
Disassembly and Cleaning for Your Powersports Engine Rebuild
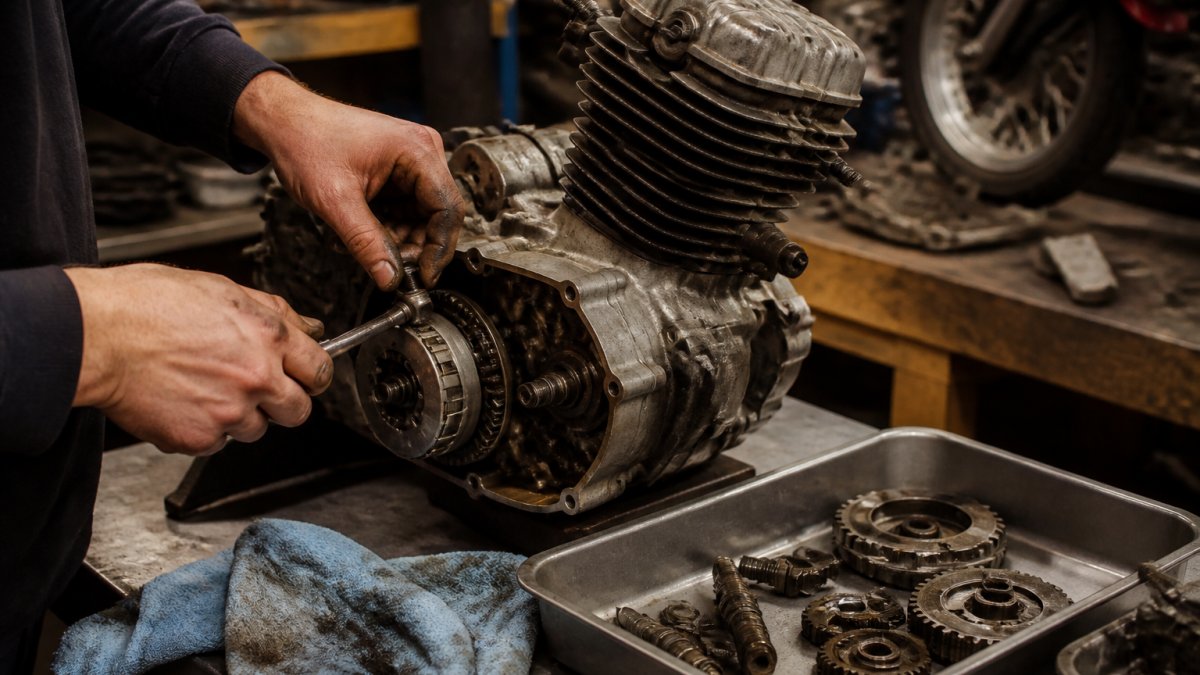
Work top-down and outside-in. Remove the carburetor, exhaust, and ignition first. Then pull the cylinder head and cylinder. Keep each cylinder's parts together, because pistons, rings, and valves wear as a matched set.
Cleaning and Corrosion Control
Corrosion is the real enemy on a vintage motor. Aluminum pits, steel rusts, and old gaskets turn to glue. Use a parts washer for metal and a soft brush for delicate castings.
For stored engines, we recommend STA-BIL Fogging Oil. It coats internal parts and prevents cylinder scuffing at startup. For fuel system cleanup, Petro Chemicals Top Engine Cleaner breaks down varnish and carbon.


Vintage Motorcycle Engine Rebuild: Measuring Tolerances and Machining Decisions
A vintage motorcycle engine rebuild lives or dies on measurement. You cannot eyeball a cylinder bore or a worn cam lobe. Get a bore gauge and a micrometer, then compare every number to the service manual spec.
Key measurements to take:
- Cylinder bore diameter and taper
- Piston-to-cylinder clearance
- Ring end gap
- Valve stem and guide wear
If a cylinder is out of spec, you have two choices: bore it oversize and fit new pistons, or sleeve it back to stock. The Engine Builder tech library notes that out-of-round bores cause ring flutter and lost compression.
| Measurement | What It Tells You | If Out of Spec |
|---|---|---|
| Cylinder bore | Wear and taper | Bore oversize or sleeve |
| Piston clearance | Piston-to-wall fit | New piston or bore |
| Ring end gap | Compression sealing | File or replace rings |
| Valve guide wear | Valve control | Replace guides |
Two-Stroke Engine Rebuild vs. Four-Stroke: Key Differences
A two-stroke engine rebuild is faster and cheaper, but less forgiving. A four-stroke rebuild takes more parts and more time, but tolerances are more stable. The real differences show up in how you inspect, measure, lubricate, and assemble each type, and getting those wrong is what turns a weekend rebuild into a repeat teardown.
Inspection and Teardown Differences
On a two-stroke, the crankcase is part of the intake tract. That means you must pressure-test the cases and seals before you trust a fresh top end.
Two-strokes also use a reed valve or piston-port intake. Inspect reeds for chips and gaps, a reed that does not seal costs you low-rpm response. Four-strokes have no equivalent; you check valve sealing instead.
Measurement and Machining Differences
Both engine types need bore, piston clearance, and ring end gap checked against the service manual. The differences are in what else you measure:
- Two-stroke: ring end gap is often tighter, and the exhaust port bridge and port chamfers matter, a sharp port edge snags rings. Check crankshaft runout and rod side clearance, because two-stroke rods run on needle bearings with no oil pressure to cushion wear.
- Four-stroke: add valve stem-to-guide clearance, valve seat width and concentricity, cam lobe lift, and cam bearing journal wear. Valve lash is set cold on most vintage designs, so confirm the spec and the temperature in the manual.
A common pattern is that two-stroke machine work is mostly boring and honing, while four-stroke work adds valve seat cutting and guide replacement, a second machine-shop line item.
Lubrication and Assembly Differences
Two-strokes get lubrication from the fuel-oil mix or from an injection pump. Use a two-stroke oil rated for the pump or premix ratio your manual specifies; Pro Honda GN2 2-Stroke Oil is a known choice for older liquid- and air-cooled machines and helps prevent stuck rings and fouled plugs.
Four-strokes need assembly lube on cam journals, followers, and valve stems, and you should prime the oil pump and fill the filter before the first crank. Turn the motor over by hand to confirm cam timing and valve-to-piston clearance before you hit the starter.
Which One Costs More to Restore
Two-strokes usually win on parts count and machine work. Four-strokes win on durability between services but lose on labor, because the valve train adds inspection, replacement, and setup steps. If your goal is a rider rather than a show piece, a two-stroke top-end refresh is often the lower-risk first project.
Parts Sourcing and Compatibility for Obsolete Components
Parts sourcing is where most vintage restorations stall. Obsolete parts are gone from dealer shelves, so you hunt through three channels: new-old-stock, reproduction, and used. The trap is not finding a part, it is finding the right part. A component that "looks right" can have a different bore, spline, thread pitch, or material, and a wrong fit can destroy a fresh top end.
Petro Chemicals Top Engine Cleaner →
Identify the Engine Before You Buy Anything
Start by decoding the engine and frame numbers stamped on the cases and steering head. Those numbers tell you the model year, the market it was built for, and often the production run.
Build a short identification sheet:
- Engine number and frame number
- Carburetor make, model, and stamped size
- Ignition type (points, CDI, magneto) and any part numbers on the stator or CDI box
- Cylinder casting number and any oversize markings
- Original paint and decal codes if you are restoring to stock
Cross-check those numbers against a factory parts catalog or service manual for your exact model year. Forum threads are useful for leads, but part numbers and specs live in the manual.
Verify Interchangeability Before You Commit
Interchangeability is where money gets wasted. A part may fit physically but differ in a way that matters:
- Pistons and cylinders: the same bore size can have different compression heights, skirt shapes, or ring locating pins. Match the piston to the cylinder and head combination, not just the bore.
- Carburetors: venturi size, jetting, and slide cutaway vary by year and market. A carb that bolts on may run lean or rich enough to damage the engine.
- Ignition and electrical: CDI boxes and stators are often year- and model-specific. A box that plugs in may have the wrong advance curve.
- Fasteners and seals: thread pitch and seal dimensions changed over the years. Measure before you force anything.
When in doubt, buy from a seller who lists the exact part number and the models it fits, and ask for photos of the number stamped on the part.
New-Old-Stock, Reproduction, and Used: How to Judge Each
- New-old-stock (NOS): original parts still in the package. Best for correctness, but rubber and seals may have aged hard even if never installed. Inspect gaskets, seals, and diaphragms before use.
- Reproduction: quality varies widely. Good reproductions match original dimensions and materials; poor ones use softer metal or thinner gaskets. Check reviews and measure critical dimensions against your manual spec.
- Used: the cheapest option and the biggest gamble. Inspect for cracks, corrosion, and wear. For engine internals, assume used pistons, rings, and bearings are worn until measured.
For carburetor work, a matched kit saves guesswork. The ALL BALLS Carburetor Rebuild Kit 226-1678 comes as a complete kit with the gaskets and parts you need for a clean rebuild, which reduces the risk of mixing incompatible pieces.

When to Walk Away
Some parts are not worth restoring. Cracked cases, bent crankshafts, and heavily pitted cylinders often cost more to repair than to replace with a good used unit. If a part is rare and expensive, get a second opinion from a machinist before you spend. The cheapest path is usually the one where you confirm fit and condition before money changes hands.
Powersports Engine Rebuild Cost: Budgeting for Your Restoration
Powersports engine rebuild cost depends on how deep you go. A top-end refresh costs far less than a full bottom-end rebuild. Machine work, parts, and tools drive the total.
What moves the number:
- Top-end kit versus full rebuild kit
- Machine shop labor for boring and valve work
- Special tools you don't already own
- Obsolete parts that only come from specialty sellers
DIY saves on labor but costs time and tooling. A shop saves time but adds labor. For a first rebuild, many riders split the work: do the teardown and assembly, and pay a shop for machining.
First Start After Engine Rebuild: Setup and Break-In
The first start after an engine rebuild is the moment of truth. Prime the oil system before you crank. On a four-stroke, turn the motor over by hand first to confirm timing and no binding.
Break-in rules:
- Vary the throttle, don't hold one speed
- Keep loads light for the first rides
- Recheck torque and fluid levels after the first heat cycle
- Change oil early to flush break-in debris
A consumer safety guide from the U.S. Consumer Product Safety Commission reminds riders to check controls and protective gear before that first ride.
Conclusion: Bringing Your Vintage Engine Back to Life
Restoring a vintage engine is patience plus measurement. Inspect first, document everything, and trust the specs over your memory.
When you're ready for parts, Monarch Sandbox carries the maintenance components and chemicals that keep a rebuild on track. We offer carefully selected products for performance and safety, and a curated catalog built for riders. Shop Now and get your vintage machine running again.
Frequently Asked Questions
What should you inspect before rebuilding a vintage engine?
Before disassembly, perform a compression test and check for unusual noises. Once apart, inspect the cylinder for scoring, measure the piston-to-cylinder clearance, and check the crankshaft for play. Look for worn bearings, damaged gaskets, and corrosion. Document everything with photos and notes. A service manual with engine specifications is essential for accurate measurement tolerances.
Is it cheaper to rebuild an engine or buy a replacement?
For vintage powersports engines, a rebuild is often the only option since replacements are scarce. A top-end rebuild with a new piston and gaskets may cost a few hundred dollars in parts, while a full rebuild with machining can exceed $1,500. Buying a used engine is a gamble on unknown condition. If the cases and crankshaft are serviceable, rebuilding is usually more cost-effective.
What should you check before starting an engine after a rebuild?
Before the first start after an engine rebuild, prime the oil system by turning the engine over by hand or with the kickstarter. Verify that the ignition timing is correct and the carburetor is set to baseline. Check for fuel and oil leaks. For two-strokes, confirm the premix ratio or injector oil level. Then start the engine and let it idle briefly, checking for unusual noises.
How do you know whether a vintage engine needs a top-end or full rebuild?
A top-end repair is usually sufficient if the bottom end is tight and quiet. If the crankshaft has vertical play, the bearings are noisy, or the cases are damaged, a full rebuild is needed. A compression test below specification and excessive oil consumption point to top-end wear. For two-stroke engines, a leak-down test can reveal seal failures that require splitting the cases.